
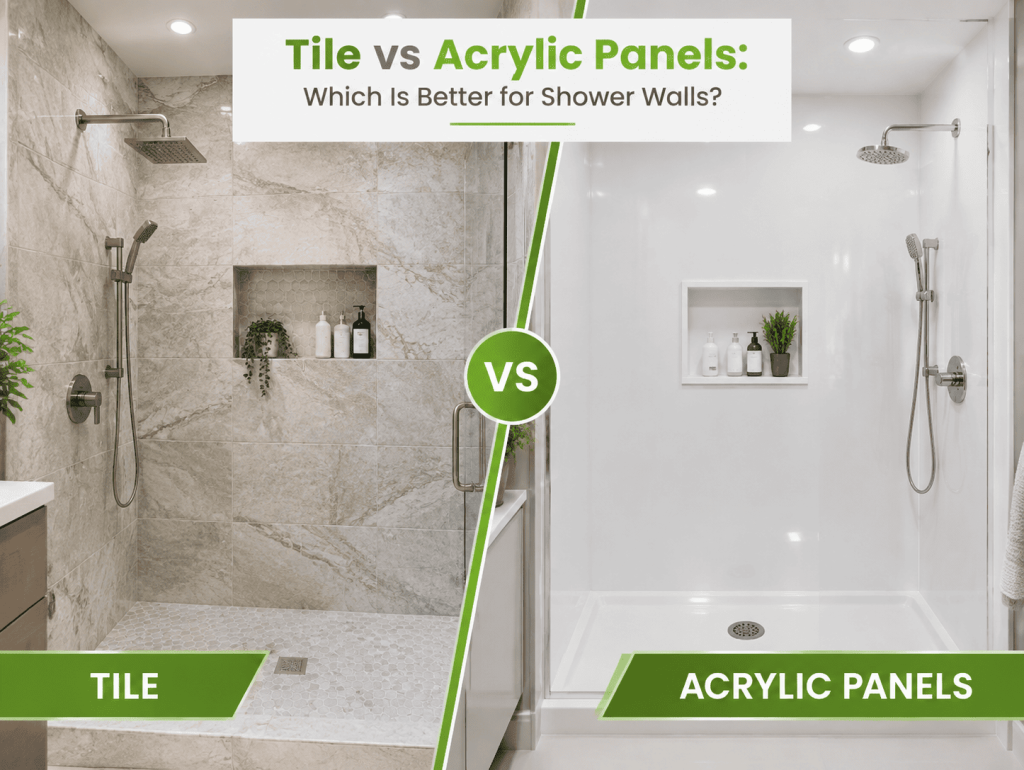
If you’re renovating a bathroom and staring at material samples, the choice between tile and acrylic panels for your shower wall comes down to one core tension: customization versus convenience. This guide is for homeowners, renovators, and anyone comparing shower wall material options for a bathroom remodel. Common shower wall materials include acrylic, fiberglass, ceramic tile, and natural stone. Tile gives you near-limitless design control but demands more time, money, and ongoing maintenance. Acrylic wall panels get you a finished shower faster and cheaper but limit what you can do aesthetically. Each shower wall material presents unique trade-offs in cost, appearance, and upkeep – and the right pick depends entirely on your priorities, budget, and how long you plan to stay in the home.
The short answer: For most homeowners renovating a primary bathroom with a 10+ year horizon, tile is the stronger investment – it lasts 30–50 years, offers unmatched design versatility, and adds more resale value. But if you need a fast, budget-friendly renovation for a guest bathroom, rental property, or secondary space, acrylic shower walls deliver a clean, low-maintenance result at roughly half the installed cost.
What Is Tile for Shower Walls?
Ceramic and porcelain tile has been the traditional choice for shower walls for decades, prized for its combination of durability and visual depth. Tiles are manufactured by firing clay or clay-silica blends at high temperatures, producing surfaces rated for moisture resistance and heavy use (PEI-4 or PEI-5 ratings for shower applications). Installation involves cement backer board or foam panel substrates, a waterproofing membrane, thinset mortar, grout, and flexible caulk at change-of-plane joints.
Tile’s defining strengths:
Design versatility – Ceramic tiles offer limitless design options for shower walls, from penny-round mosaics and metro subway tile to large format tiles and natural stone slabs. The aesthetic appeal of porcelain tile includes a wide variety of colors and finishes.
Durability – Ceramic tile is highly durable and water resistant; porcelain tiles are exceptionally resistant to cracking and moisture. A properly installed tile shower can last 30–50+ years.
Customization – Ability to incorporate built-in niches, benches, accent borders, herringbone patterns, vertical tile layouts, and mixed materials like glass tiles that enhance lighting in small bathrooms.
Water resistance – When paired with proper waterproofing membranes and sealed grout joints, tile creates a reliable moisture barrier.
What Are Acrylic Shower Panels?

Acrylic shower wall panels are prefabricated sheets made from polymethyl methacrylate (PMMA), often reinforced with fiberglass for rigidity. Panels typically range from 1/8-inch to 1/4-inch thick and are thermoformed or molded into solid-color, gel-coat, or printed finishes that mimic stone tile or ceramic patterns. They mount over prepared studs with adhesive and mechanical fasteners, with seams sealed using color-matched caulk.
Acrylic panels’ defining strengths:
Quick installation – No thinset, no grout curing. Acrylic shower wall panels are budget-friendly and easy to install, with most standard projects completed in 1–2 days.
Low maintenance – The non-porous, smooth surface eliminates grout lines entirely. Acrylic shower walls require minimal maintenance and cleaning – just a wipe-down with a soft cloth and mild soap.
Budget-friendly – Acrylic is the most budget-friendly shower wall material, with installed costs often running 40–60% less than comparable tile work.
Seamless appearance – Large panels or one-piece surrounds provide a sleek, modern look with minimal visible joints.
Tile vs Acrylic Panels: How They Compare at a Glance
Factor | Tile (Ceramic / Porcelain / Stone) | Acrylic Shower Panels |
|---|---|---|
Best for | Luxury bathrooms, long-term ownership, custom design, resale value | Rental properties, guest bathrooms, budget renovations, quick turnarounds |
Material Cost | ~US$1,000–$4,000+ for a standard sized shower (tile, backer board, membrane, grout) | ~US$200–$1,500 for panels/kits |
Installed Cost | US$9,500–$20,000+ depending on tile quality and region | US$3,500–$7,500 for standard three-wall surround |
Installation Time | 5–10 working days (includes curing) | 1–2 days |
Design Options | Unlimited - size, pattern, texture, natural stone, mosaics, glass tile, niches, benches | Limited - pre-manufactured patterns, some printed stone/tile looks; custom features restricted |
Maintenance Level | Higher - grout sealing every 1–2 years, periodic regrouting, caulk replacement | Lower - occasional caulk upkeep, simple cleaning; but full panel replacement when damaged |
Acrylic panels win on upfront cost, speed of install, and day-to-day cleaning ease, while tile wins on long-term durability, design flexibility, resale value, and overall lifetime return, but your total project budget will also depend on broader factors like layout changes and whether you’re planning a tub to shower conversion cost as part of the remodel. |
Cost and Installation Complexity

Shower materials can account for 40–60% of remodeling budgets, making cost the first filter for most homeowners. The gap between tile and acrylic is significant – and it’s not just about material price.
For materials alone, tile offers a wide range of price points from budget to high end: basic ceramic tile starts around US$0.50 per square foot, while premium porcelain, natural stone, or glass tile can exceed US$15 per square foot. Add backer board, waterproofing membrane, thinset, grout, and sealers, and material costs for a standard shower typically land between US$1,000 and US$4,000+ before labor. Acrylic panels typically offer a more budget-friendly option than porcelain or stone – basic alcove kits run US$200–$800, with premium panels or full kits reaching around US$1,500.
Installed costs widen the gap further. Tile installation requires specialized labor – experienced tilers and waterproofing professionals – pushing typical installed costs to US$9,500–$13,000 for basic porcelain work, and US$15,000–$20,000+ for mid-range to premium natural stone or decorative tile. Acrylic surrounds installed typically run US$3,500–$7,500 for standard three-wall setups.
Installation time is equally lopsided. A tile shower typically takes 5–10 working days, partly due to curing times for membranes, thinset, and grout, plus lead time for glass door fabrication. The process is time consuming and requires the bathroom to be out of service for over a week. Acrylic panel systems in favorable conditions can be completed in 1–2 days – sometimes just a single day for straightforward projects when no major substrate repair is needed.
Winner: Acrylic panels – They cost roughly half as much installed and take a fraction of the time. The trade-off is clear: tile’s higher cost buys significantly greater durability, design control, and resale appeal that may justify the investment for long-term homeowners.
Design Flexibility and Customization

The shower is often the visual centerpiece of a bathroom, and design options matter – especially in a primary bath or walk-in shower where the walls dominate the space.
Tile provides unmatched design Flexibility with various colors and patterns. You can vary tile size from 1×1-inch mosaics to 60×120 large-format porcelain slabs. Layout patterns range from stacked and running bond to Zigzag pattern. Textures include matte, polished, glazed, and natural stone finishes. Natural stone offers unique patterns that synthetic materials cannot match, while glass tile shower surrounds enhance lighting and create a contemporary look in small bathrooms. You can build niches, benches, curved walls, and accommodate multiple shower heads – tile adapts to virtually any architectural vision, including fully accessible layouts like a curbless walk-in shower remodel.
Acrylic panels are more limited. Pre-formed shapes limit layout flexibility. Manufacturers generally discourage cutting panels for custom niches or benches because doing so can compromise waterproofing and void warranties. Printed tile-look panels are growing in availability and improving visually, but close inspection reveals flat surfaces with no real depth and sometimes visible seams. Laminate shower panels offer a realistic look with many patterns and represent another alternative, but they share similar limitations. Among other materials, cultured marble and solid surface panels provide more convincing stone-like aesthetics but at higher price points.
Winner: Tile – Nothing else matches its range of size, texture, pattern, and the ability to create truly custom layouts. Acrylic provides sufficient variety for clean, modern looks in standard configurations, but falls short for bespoke or high-end design work.
Maintenance and Cleaning Requirements

Maintenance needs vary greatly among different shower wall materials, and ongoing upkeep is what separates short-term satisfaction from long-term regret.
Tile maintenance demands consistent attention. Tiles with grout lines trap soap scum and mildew, requiring more maintenance. Daily or weekly tasks include squeegeeing surfaces and scrubbing grout lines. Tile requires regular cleaning to prevent mold growth in grout – cement-based grout typically needs resealing every 1–2 years to resist moisture infiltration. Caulk at corners and floor joints should be replaced roughly every 7–10 years. Full regrouting may become necessary every 10–15 years. Annual maintenance costs run approximately US$30–$100 for sealers, specialized cleaners, and occasional repairs. Natural stone demands periodic sealing to maintain its appearance and adds further to the maintenance burden. Neglected grout can lead to water damage behind walls and mold growth in the substrate.
Acrylic maintenance is markedly simpler. The smooth surface is non-porous, meaning no grout to seal or scrub. Daily cleaning involves wiping down with a soft cloth and mild soap. Avoid abrasive cleaners, which can scratch the surface and create micro-scratches that trap soap scum over time. Annual maintenance costs are roughly US$10–$30 for cleaners and occasional caulk. However, caulk lines between panels and at floor transitions tend to yellow and separate after 5–8 years. And when damage does occur – a crack, deep scratch, or warping – repair typically means replacing the entire back panel or full panel rather than swapping a single tile.
Fiberglass shower walls are popular for their low cost and easy maintenance as well, and the differences between acrylic, PVC, and solid-surface shower walls are worth understanding since solid surface shower panels are non-porous and easy to maintain – both represent additional low-maintenance alternatives worth considering for your next project.
Winner: Acrylic panels – They’re genuinely easier and cheaper to maintain day-to-day and year-to-year. The trade-off: when acrylic eventually fails (seam issues, surface degradation), repairs are all-or-nothing. Tile demands more regular effort, but problems are localized – you can fix a few grout joints or replace individual tiles without redoing the entire shower.
Durability and Longevity
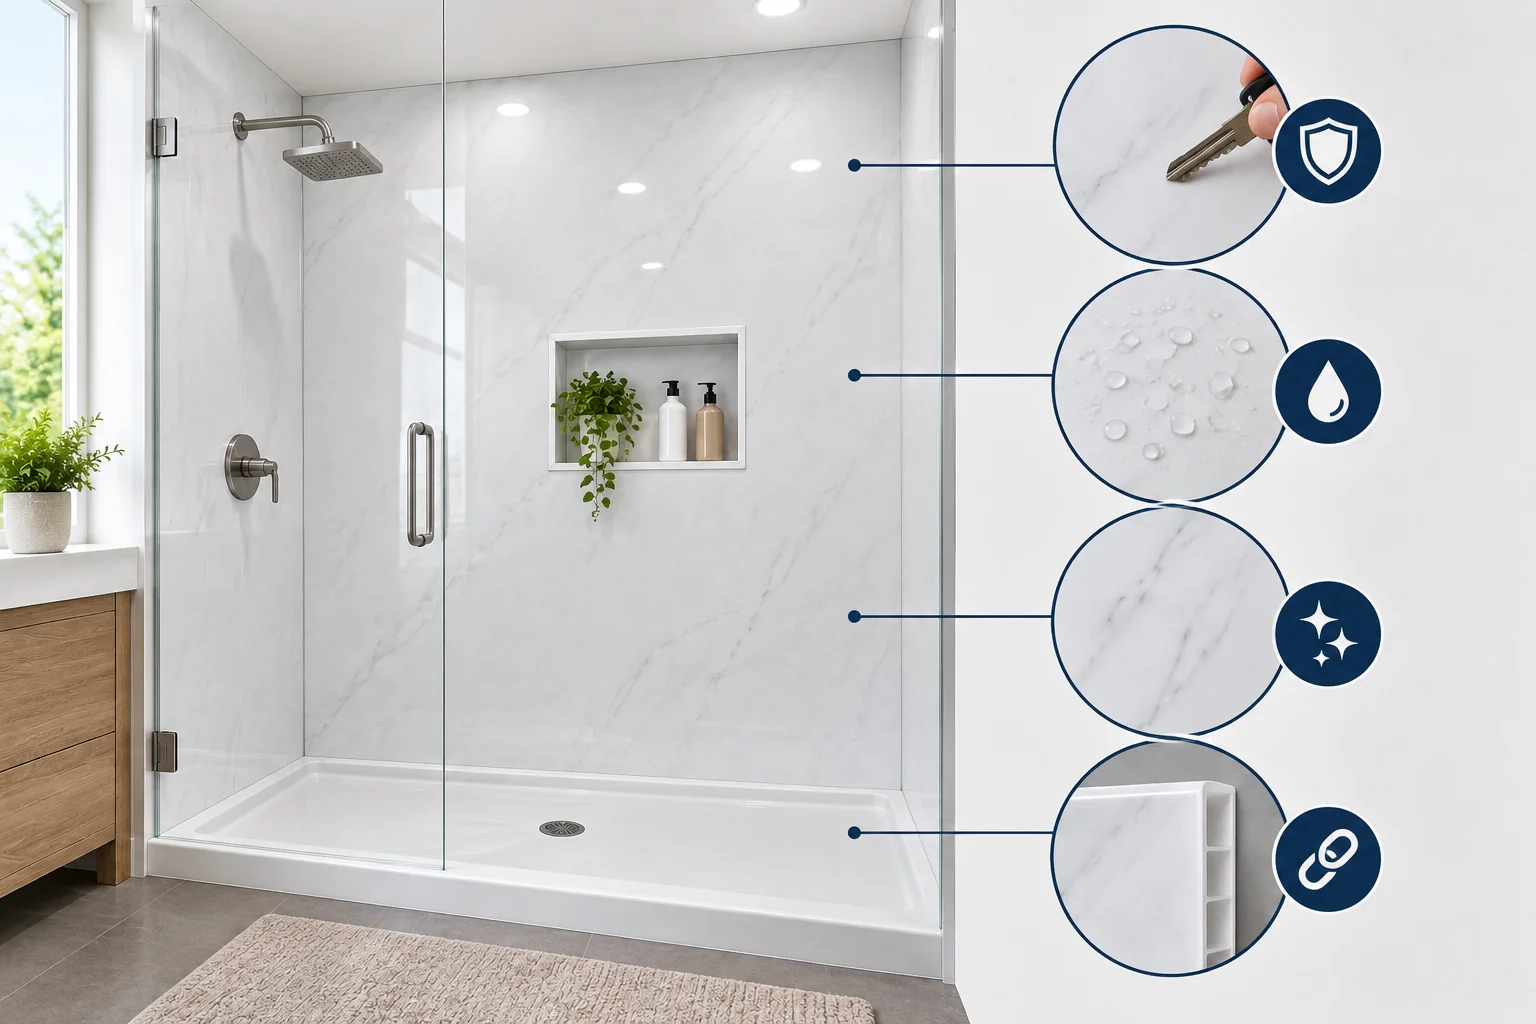
For a bathroom investment of several thousand dollars, lifespan matters. This is where tile and acrylic diverge most dramatically.
Ceramic and porcelain tiles offer high durability and endless design options, and their physical resilience matches their aesthetic range. Porcelain is extremely hard, resistant to scratches and abrasion, does not fade, and won’t warp. A properly built tile shower – with waterproof membrane, quality substrate, and maintained grout – can last 30–50+ years, as seen in many long-lasting tile installations showcased in our remodeling project galleries. Some well-maintained tile showers exceed 50 years with only minor grout aging. Glass tile can enhance durability but is more expensive. Stone tile is slightly more vulnerable to staining and etching but remains exceptionally long-lived with periodic sealing.
Acrylic shower walls can last over 30 years with proper care under ideal conditions, though most industry data puts the practical lifespan at 8–15 years before visible signs of aging appear – seam caulk failure, yellowing (especially with UV exposure from windows), surface scratches, or structural issues. Fiberglass shower walls are popular for their low cost and durability as a related alternative. Solid surface materials are typically used in luxury bathrooms and typically last 20–30 years, splitting the difference. Quartz panels do not require sealing and are highly stain resistant, offering another durable option.
Over a 30-year ownership horizon, the math is instructive. A mid-tier acrylic surround installed at ~US$5,500, plus one or two replacement cycles and caulk maintenance, totals approximately US$11,000 in today’s dollars. A comparable tile installation at ~US$13,000 with periodic caulk, grout sealing, and occasional regrouting comes to roughly US$15,400 over the same period. The lifetime cost difference of ~US$4,400 (about $147/year) may be offset by tile’s contribution to resale value and by choosing low-maintenance, grout-free systems like those outlined in bathroom remodeling FAQs from Academy Construction.
Winner: Tile – Its capacity to endure decades with localized, manageable repairs makes it the more durable long-term investment. Acrylic delivers an acceptable lifespan for moderate use, but visible aging arrives sooner and replacement is more disruptive when it comes.
Tile vs Acrylic Panels: Which Should You Choose?
Choose tile if you’re renovating a primary bathroom in a home you plan to keep for 5–10+ years, you want maximum control over design and style (especially for a walk-in shower or steam shower), you have a flexible timeline that accommodates 5–10 days of installation, and your budget allows for higher upfront costs in exchange for decades of performance. Tile is also the stronger choice when resale value matters – buyers in higher-priced homes expect tile, particularly in primary bathrooms.
Choose acrylic panels if you need a cost-effective renovation completed quickly, you’re outfitting a guest bathroom or rental property, you want genuinely low maintenance without grout sealing or scrubbing, or your budget is the primary constraint. Acrylic is also practical for new construction projects where speed and standardization outweigh customization, and it often features prominently in bathroom remodeling and shower installation projects where quick turnaround and predictable costs are critical.
For the most common scenario – a homeowner in a mid-market home with a moderate budget and a 10-year horizon – tile generally edges acrylic as the best material if the budget allows. The higher upfront cost is offset by superior durability, design flexibility, and resale contribution. But this isn’t a universal verdict. If budget or timeline constraints dominate, or if maintenance capacity is limited, acrylic panels are a legitimate, practical choice – not a compromise.
Common shower wall materials include acrylic, fiberglass, ceramic tile, and natural stone, and the right pick among them depends on matching your priorities to each material’s real strengths and limitations, especially in small footprints where maximizing your small bathroom space becomes just as important as choosing the wall material itself.
Frequently Asked Questions
Can you install acrylic panels over existing tile?
It’s technically possible but comes with significant caveats. The existing substrate must be sound – no water damage, no loose tiles – and the surface must be flat enough for panels to adhere uniformly. Uneven grout lines or protruding tiles can prevent proper bonding. Most manufacturers’ warranties require panels to be installed over clean drywall or backer board, not over existing tile. If you cut acrylic panels to accommodate niches, you risk compromising their waterproof integrity. For best results, removing old tile down to the substrate before installing acrylic is the safer, warranty-preserving approach, especially if you’re converting a tub into an easy entry safety shower for accessibility.
Which material adds more value to home resale?
Tile generally contributes more to perceived home value, especially in homes priced above US$600,000 where buyers expect high-end finishes. A tile shower – particularly with natural stone, large format tiles, or decorative mosaic accents – reads as a custom, permanent upgrade. Acrylic is often perceived as builder-grade. That said, for short-term sales within 1–2 years where budget constraints are evident, the lower cost of acrylic may not significantly hurt the listing. Coordinating the enclosure with the right sliding, pivot, or frameless shower door and marketing photos of tile shower walls consistently elevate perceived quality.
How do warranties compare between tile and acrylic panels?
Warranty structures differ significantly. Tile manufacturers often provide lifetime coverage for the tile itself (against glaze defects, frost damage), while installation workmanship is typically warranted for 1–3 years by the contractor. Waterproofing membranes and substrates carry separate manufacturer guarantees. Acrylic panel manufacturers frequently offer lifetime or long-term material warranties, but installation, caulk, and seam integrity – the most common failure points – are usually guaranteed for only 1–2 years. Damage from abrasive cleaners, impact, or UV exposure is generally excluded from acrylic warranties. In practice, the weak link for acrylic is almost always the seams and caulk, not the panel material itself, which is why partnering with a contractor whose mission centers on long-term performance and trust can be just as important as the material choice.


